🎃 Mummy Oreo Pops: The Cutest Spooky Treat You’ll Make This Halloween
I love a good Halloween treat. But what I love even more? When it looks like I spent hours making it… but it actually took about ten minutes and a cup of melted chocolate. 👻✨
These little Mummy Oreos are the perfect mix of spooky and sweet. They’re playful, festive, and—let’s be honest—downright adorable. If you’re hosting a Halloween party, dropping off treats for friends, or just want to make something fun with your kiddos (or grand-kiddos!), this is the one.
This isn’t some complicated Pinterest project that ends with a kitchen disaster and a frosting-covered dog. Nope. This is the kind of recipe that works—and makes you the “hostess with the ghostess” in no time.
🧡 Why I Love These So Much
Halloween is one of those holidays that brings out everyone’s inner kid. The twinkly lights, the costumes, the smell of cinnamon candles and caramel apples—there’s just a little bit of magic in the air.
But between decorating, costumes, and trick-or-treat prep, who has time to make complicated desserts? That’s where these mummy pops come in. They’re:
Easy. Melt, dip, drizzle, done. Adorable. Everyone loves the little candy eyes staring back at them. Customizable. You can make them with or without sticks, use different colors, or even turn them into other creatures (Frankenstein Oreo pops, anyone?). Portable. They’re perfect for Halloween classroom parties, neighborhood get-togethers, or just sitting on the counter looking cute.
🕸️ What You’ll Need
This is one of those ingredient lists that doesn’t require a trip to a fancy bakery supply store. You can find everything at your local grocery store—or you might already have it at home.
Oreos — The orange-filled Halloween ones make these extra festive. But regular Oreos work too! White chocolate or white candy melts — Either works great. I love using candy melts because they’re foolproof for dipping. Candy eyeballs — These little guys are the secret to making them so stinkin’ cute. Cake pop sticks (optional) — Not required, but they make dipping so much easier and add a fun lollipop effect.
🍫 Directions (a.k.a. How to Mummify Your Oreos)
1. Melt the chocolate
Place your white chocolate or candy melts in a microwave-safe bowl. Heat in 20-second intervals, stirring between each burst, until smooth and silky. Be patient—rushed chocolate turns grainy faster than you can say “boo.”
2. Insert the sticks
Gently press a cake pop stick into the cream center of each Oreo. This gives you more control during dipping and keeps the cookie from splitting in half.
3. Dip the Oreos
Dip each Oreo into the melted chocolate, coating it completely. Let the excess drip off (a gentle twirl of the stick helps) and lay them flat on parchment paper.
💡 Pro tip: If you’re not using sticks, just drop the Oreos into the chocolate, flip with a fork, and lift them out carefully.
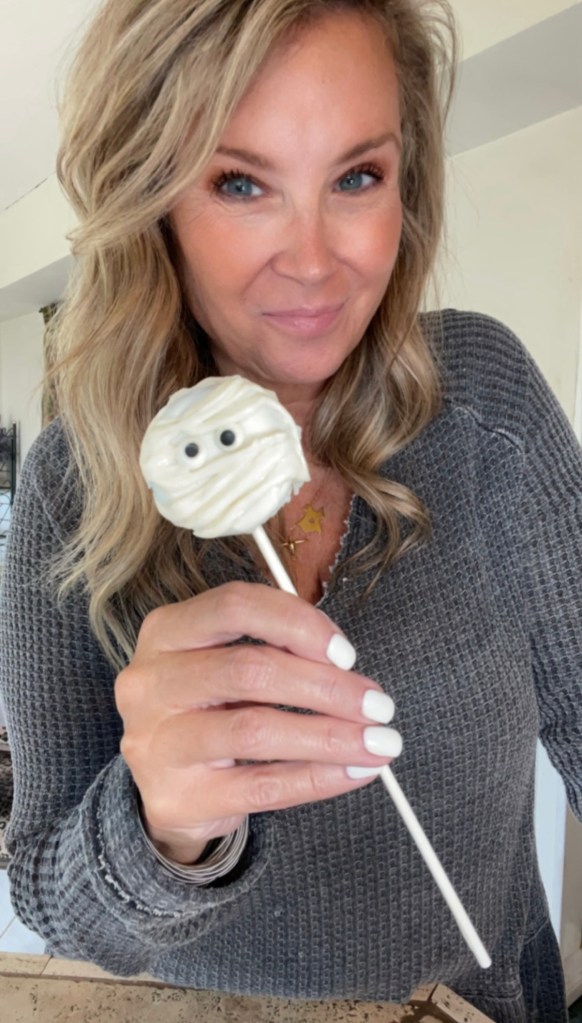
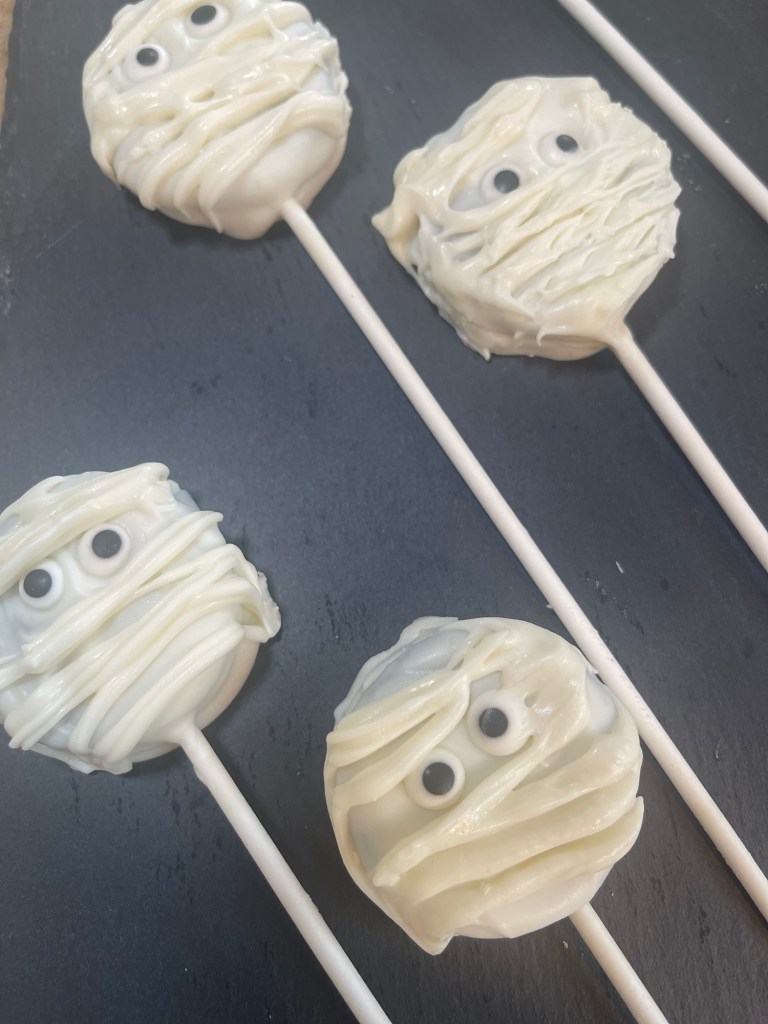
4. Add the eyes
While the chocolate is still soft, place two candy eyeballs on each Oreo. Don’t wait too long here—once the chocolate sets, they won’t stick.
5. Create the mummy wrap
Once that first coat has set a bit (not fully hard), drizzle extra white chocolate over the top in a zigzag pattern. You can use a piping bag, a plastic sandwich bag with a tiny corner snipped off, or even a fork for a messier, creepier look.
This step is what gives them their classic “wrapped” mummy look.
6. Let them set
Let the chocolate harden completely. If you’re impatient (like me), pop the tray in the fridge for 10–15 minutes.
7. Enjoy the magic
Once they’re firm, they’re ready to go! That bright orange center peeking out when you bite in? Pure Halloween happiness. 🎃✨
👻 Easy Variations to Try
These mummy pops are fun as-is, but if you like to get creative in the kitchen, here are a few fun twists:
Chocolate mummies: Use regular Oreos and dark chocolate coating. Then drizzle with white chocolate for a spooky contrast. Sprinkle party: Add Halloween sprinkles or edible glitter before the mummy drizzle sets for a fun twist. Monster mash: Use green candy melts instead of white and create Frankenstein faces with black icing hair. Spider web effect: Drizzle in a more web-like circular pattern and stick a little candy spider on top.
🧁 How to Serve Them Like a Pro
Presentation makes everything more magical—especially around the holidays. A few cute serving ideas:
Stick the pops upright in a foam block covered in black tissue paper for a “mummy forest” effect. Arrange them on a Halloween-themed tray with fake cobwebs, plastic spiders, or mini pumpkins. Pop them in little cellophane bags with a festive ribbon for party favors or classroom treats. Pair them with a warm cup of cider or hot cocoa for a cozy night in.
🧊 Storing Your Mummy Oreo Pops
If you make them ahead (highly recommend for parties), store the finished mummy pops in an airtight container.
Room temp: Up to 3 days. Fridge: Up to a week. Freezer: You can freeze them, but they’re best fresh—the candy eyes can get a little cloudy when defrosted.
They’re sturdy enough for transport, which makes them perfect for gifting or party prep.
🥰 Why This Recipe Works So Well for Every Age
The best part about this recipe? Anyone can make it.
Kids love dunking and decorating (and sneaking a few Oreos along the way). Teens love sharing the final results on social media. And adults? Well… adults love anything that pairs well with coffee or a cozy fall evening.
It’s a low-stress, high-fun treat that adds an instant touch of festive cheer.
🍂 Tips & Tricks from My Kitchen
Use a deep, narrow bowl for dipping so the Oreos go in cleanly without wasting chocolate. Don’t rush the drizzle. A little patience here makes the mummy wrap look just right. Work in batches. If you’re making a big tray, dip and decorate a few at a time so the chocolate doesn’t harden before the eyes go on. Add a pop of color. A tiny orange or purple bow on the stick makes these perfect party favors. No sticks? No problem. A fork works just fine for dipping.
🧡 Behind the Scenes: Why I Love Festive Treats Like This
There’s something nostalgic about Halloween treats. They remind me of bake sales, classroom parties, and little moments when the world felt just a bit more playful.
I love creating recipes that make people smile before they even take a bite. And when something looks fancy but takes minimal effort? That’s my sweet spot. These mummy pops are one of those recipes that give you the “wow” factor without the meltdown.
They’re also a great way to make memories. If you’re hosting a Halloween get-together, set out all the supplies—melted chocolate, Oreos, eyes, sticks—and let your guests decorate their own. It turns dessert into an activity everyone will remember.
✨ Perfect Pairings for a Spooky Spread
Want to go all in on your Halloween table? Here are a few other treats and touches that pair beautifully with mummy pops:
Witch Hat Brownie Bites: Mini brownies topped with chocolate-dipped sugar cones. Pumpkin Cheesecake Dip: A creamy orange dip served with graham crackers. Hot Cocoa Cauldron Bar: A little station with mini marshmallows, whipped cream, candy corn, and edible glitter. Pumpkin spice mocktails or apple cider: Because every sweet treat deserves a cozy drink.
Throw in a couple of twinkle lights, some spiderweb garlands, and maybe a few fake ravens perched around the kitchen—and boom. Insta-worthy Halloween vibes without the stress.
🕯️ A Little Encouragement Before You Start
Here’s the thing about holiday baking (or candy making): it doesn’t have to be perfect to be magical.
Your drizzle might be a little messy. One of your mummy’s eyes might slide a little to the left. Maybe your chocolate didn’t melt into a glossy magazine finish. It doesn’t matter.
What matters is the fun of making it, the smiles when people see it, and the sweet, festive bite when they taste it. Halloween isn’t about perfection—it’s about joy, creativity, and a little dash of spooky charm.
🧡 Final Thoughts
These Mummy Oreo Pops check all the boxes:
✔️ Easy
✔️ Fun
✔️ Festive
✔️ Totally delicious
They’re proof that you can create something cute and memorable with just a handful of ingredients and a few minutes of your time.
Whether you make them for a big Halloween bash or just as a fun kitchen moment with your favorite people, these little mummies will absolutely steal the show.
So grab your Oreos, melt that chocolate, and get ready to summon some sweet Halloween magic. 🧙♀️✨
P.S. If you try this recipe, tag me so I can see your mummy army! And if you love easy seasonal recipes like this, stick around—because I’ve got plenty more spooky (and delicious) fun coming your way. 🎃👻🍫

Leave a comment